Homemade Garlic Aioli Sauce
Highlighted under: Global Recipe Vault
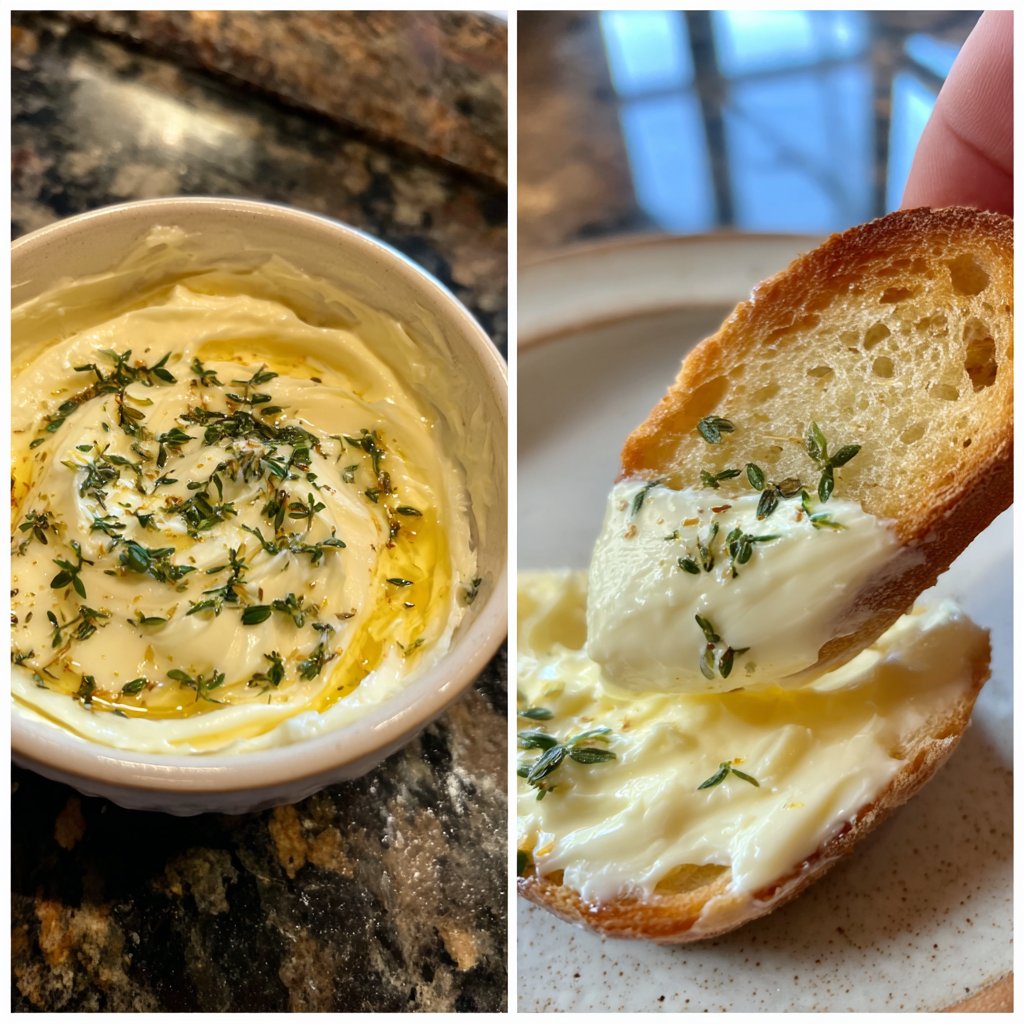
I absolutely love making Homemade Garlic Aioli Sauce because it elevates any dish it touches. Whether I'm serving it with crispy fries or a fresh vegetable platter, this creamy, garlicky delight never fails to impress. The best part is how simple it is to prepare; with just a handful of ingredients, I can whip it up in no time. The balance of flavors is fantastic, making it a staple in my kitchen for sauces, dips, and spreads. Trust me, once you make it, you'll never want to buy store-bought again!
When I first tried making aioli from scratch, I was blown away by how fresh and flavorful it turned out. Unlike the store-bought varieties, my homemade aioli is bursting with vibrant garlic flavor and a silky texture that’s completely addictive. I love using high-quality olive oil for a rich taste, and the hint of lemon juice really brightens it up.
One of my favorite tips is to start with room temperature eggs, as it helps achieve that perfect emulsification. This method has never failed me, and now I make it regularly for gatherings and barbecues. Plus, it pairs beautifully with grilled meats, roasted vegetables, or simply as a spread on sandwiches!
Why You Will Love This Recipe
- Irresistibly creamy with a robust garlic flavor
- Perfect for dipping or slathering on sandwiches
- Quick and easy to prepare in just a few minutes
The Importance of Fresh Garlic
Using fresh garlic is key to achieving that robust flavor you crave in a homemade aioli. Minced garlic should be finely chopped to allow maximum flavor infusion, while letting it rest with salt helps mellow its sharpness. This technique enhances the garlic’s natural sweetness, creating a more balanced sauce. If you’re short on fresh garlic, feel free to use garlic powder in a pinch, but keep in mind the flavor won't be as vibrant.
When preparing garlic for aioli, consider the strength of the garlic variety. Some, like white garlic, provide a pungent punch, while others, like purple garlic, may offer a milder profile. Choosing the right type can significantly impact the final taste of your aioli, so don’t hesitate to experiment and find your preferred garlic flavor.
Emulsification Techniques
The emulsification process is crucial for that creamy texture in your aioli. Drizzling in the olive oil slowly while whisking vigorously allows air to incorporate and helps the fat particles bind with the water from the egg and lemon juice. If the mixture doesn’t thicken properly, it may be due to adding the oil too quickly; be patient and keep whisking. Alternatively, you can use a food processor on low speed for easier emulsification.
For those who may want a lighter version of aioli, consider using a combination of olive oil and a lighter oil, like canola or grapeseed oil. This can reduce the overall intensity and still give a desirable creamy consistency. Just remember that the flavor balance will change slightly, so adjust your garlic and lemon juice to compensate.
Storage and Serving Suggestions
This homemade garlic aioli can be refrigerated in an airtight container for up to a week. To maintain its freshness, avoid exposing it to air as much as possible. If you notice any discoloration or off smells, it’s best to discard it. I love using it as a dip for roasted vegetables or a spread on sandwiches, but get creative!
For a twist on traditional aioli, consider adding different herbs or spices. A bit of smoked paprika can add depth, while fresh herbs like dill or basil can give a refreshing lift. Experimenting with flavors can yield unique dips that suit your palate and elevate your meals. Enjoy it fresh, but knowing it will hold up well in the fridge allows you to make a batch ahead.
Ingredients
Main Ingredients
- 1 large egg
- 1 cup olive oil
- 2 tablespoons lemon juice
- 2-3 cloves garlic, minced
- Salt, to taste
Instructions
Prepare the Ingredients
In a medium bowl, combine the minced garlic and a pinch of salt. Let it sit for 10 minutes to mellow the garlic flavor.
Mix the Aioli
Add the egg and lemon juice to the garlic mixture. Whisk together until combined.
Emulsify with Olive Oil
While whisking continuously, slowly drizzle in the olive oil until the mixture thickens and becomes creamy.
Season and Serve
Taste the aioli and adjust seasoning with additional salt or lemon juice as needed. Serve immediately or store in the refrigerator for up to one week.

Pro Tips
- For a variation, try adding herbs like basil or dill to the aioli for an extra flavor boost. If you prefer a stronger garlic taste, increase the garlic cloves, but be cautious as it can become quite pungent.
Common Troubleshooting Tips
If your aioli isn’t emulsifying and appears separated, don’t panic. You can fix it by starting with a fresh egg yolk in a clean bowl and slowly whisking in the broken aioli mixture. This can coax the oils back into a creamy consistency, ensuring you don’t have to toss your efforts out.
Another common issue is an overly garlicky flavor that can be overwhelming. If you find that the garlic is too strong, adding a little additional lemon juice or a pinch of sugar can help balance the flavors, making your aioli more palatable without losing its core essence.
Ingredient Variations
If you're looking for a vegan adaptation, replacing the egg with aquafaba (the liquid from canned chickpeas) can create a similar creamy texture. It’s important to note that the flavor will be slightly different, yet still delightful. For extra flair, incorporate flavors like roasted red peppers or chipotle for a smoky aioli rendition.
For a zesty citrus twist, try adding lime juice instead of lemon. This slight shift in acidity can brighten up your aioli and pair well with seafood dishes or tacos, making it a versatile addition to your culinary repertoire.
Questions About Recipes
→ Can I use mayonnaise instead of egg?
Yes, you can use mayonnaise to create a quick version of aioli, but the texture and flavor will differ.
→ How long does homemade aioli last?
Homemade aioli can be stored in the refrigerator for up to one week.
→ What can I serve with aioli?
Aioli is great with fries, grilled meats, vegetables, sandwiches, or as a dip for chips.
→ Can I freeze aioli?
It's not recommended to freeze aioli as it may separate and change texture upon thawing.
Homemade Garlic Aioli Sauce
What You'll Need
Main Ingredients
- 1 large egg
- 1 cup olive oil
- 2 tablespoons lemon juice
- 2-3 cloves garlic, minced
- Salt, to taste
How-To Steps
In a medium bowl, combine the minced garlic and a pinch of salt. Let it sit for 10 minutes to mellow the garlic flavor.
Add the egg and lemon juice to the garlic mixture. Whisk together until combined.
While whisking continuously, slowly drizzle in the olive oil until the mixture thickens and becomes creamy.
Taste the aioli and adjust seasoning with additional salt or lemon juice as needed. Serve immediately or store in the refrigerator for up to one week.
Extra Tips
- For a variation, try adding herbs like basil or dill to the aioli for an extra flavor boost. If you prefer a stronger garlic taste, increase the garlic cloves, but be cautious as it can become quite pungent.
Nutritional Breakdown (Per Serving)
- Calories: 120 kcal
- Total Fat: 13g
- Saturated Fat: 2g
- Cholesterol: 37mg
- Sodium: 45mg
- Total Carbohydrates: 1g
- Dietary Fiber: 0g
- Sugars: 0g
- Protein: 1g